The Art of the Sandwich-What makes a sandwich special?

"Let's just grab a sandwich..................." 

We've all said that at one time or another, as if a sandwich is an inferior meal choice.  Granted, some sandwiches are sad, a thoughtless throwing together of pedestrian bread, a schmear of flavorless mayo, some cheese and deli meat, with a slice of under-ripe tomato and a leaf of aged, rusty lettuce. Truly nothing to savor.  I love a sandwich as a meal, and I think sandwiches have the potential to be some of the best food you've every eaten!  Simply start with a bit of inspiration and use tasty ingredients to create a tantalizing, hand-held masterpiece!

Owning and operating the cafe provided a captive audience for experimenting with all kinds of sandwiches.  Cold, hot, grilled, paninis, wraps, the variety was endless and inspiration was everywhere; I could hardly lay down at night to go to sleep without thinking of a new sandwich!  Through lots of experimentation, I discovered some characteristics that were consistently appreciated by our customers, and they became my guidelines for creating memorable sandwiches.

A pinch of synergy, please!

Where do we begin when creating a memorable sandwich?  The common denominator of enduring classic sandwiches, such as the Reuben, is balance.  All of the ingredients and flavors need to complement each other; sandwich synergy!  I worked to identify and refine how each component of a sandwich impacted the finished product.  So let's briefly look at the components of the sandwich;  while hard to put"taste" and "art" into words, this is my attempt!

A Solid Foundation

I once heard a wise man say that you can always judge a restaurant by its coffee and its bread.  I never forgot that, and it was my goal to always have the best of both at the cafe!  The foundation of any sandwich is the "container" or "holder" of the ingredient.  Though often it is bread,  it can be any number of things (bun, tortilla, naan, lettuce, etc.)  And since it is the foundation, it needs to be of the highest quality, in keeping with my sandwich guidelines.  When we first opened, we ordered all of our bread products from a couple of bakeries that delivered fresh every day. The bread, buns, and rolls were always freshly baked from high-quality ingredients, and our customers noticed!  I heard it all the time; "these sandwiches taste so fresh, and the bread is wonderful!".  The bread matters!  So do not skimp; either buy good stuff or make your own.  Along the way, I developed my own recipes for several kinds of ciabatta and focaccia, as well as dinner rolls and bread sticks to serve at the cafe because they were superior to anything we could purchase.  (Many of the recipes are available on the website now, with more to come!)  The point here is that no sandwich can be successful if it is built on a foundation of anything that is stale, dry, soggy, or tasteless, so seek out the best foundation ingredients you can find.

Love those fillings!

Whether making a Reuben, grilled cheese, tuna salad, or turkey wrap, the filling has to be of the best-quality ingredients.  So skip the packaged deli meat and processed cheese and opt for freshly-sliced deli meats and best-quality cheeses.  You will taste the difference!  And that includes all of the produce that will be used in a sandwich; every ingredient adds to or detracts from the finished product.  Fresh, crisp, dry, cold lettuce, ripe tomatoes (ripe or none, under-ripe tomatoes are the bane of any potentially good sandwich!), flavorful (not hot) onions sliced paper thin, and more; all of these elements make or break a sandwich.  The same goes for cheeses, pickles, relishes, condiments; only the best!  And don't forget to season any veggies on the sandwich; a kiss of salt and pepper can be the difference between ho-hum and fantastic.

The finishing touches......

So you've decided on a great foundation and have fresh, flavorful fillings.  Now it's time for the extras that lend personality and that "wow factor" that everyone desires in a sandwich.  Here is where sandwich-building gets interesting and rewarding.  Sauces (different flavors of mayonnaise, relishes, chutneys, jams, and more), cheeses, pickles, bacon, eggs, these are all the things that, when carefully and thoughtfully chosen, make a sandwich memorable.  I wish I could give you a simple formula that would this process effortless, but this is where tasting, experimenting, imagination, and your palate come int to play, the "art" of the sandwich.  The more you play with your food and taste, taste, taste, the more confident you will become when creating new, memorable sandwiches!

Go forth and assemble!

The basic fundamentals of sandwich making are now in your back pocket!  When you think about it, making a sandwich is like creating a piece of edible art, so be thoughtful about what you want to create. What flavors complement each other?  Remember heat needs cool, sweet needs sour, salt needs a bland counterpoint. You might be going for a particular nationality such as Italian or Vietnamese-what ingredients are typically used in those cuisines? Think about the flavors of the season.  And think about the flavors you enjoy in non-sandwich dishes.  Put them in a sandwich!  I think most dishes can be deconstructed and served as a sandwich, it just takes a little imagination! 

The nuances of the art of sandwich making are discovered as you create sandwiches.  Start with recipes that you love, try out the recipes here, then take the leap and create something original.  I promise, you will begin to combine flavors, textures, and temperatures that you've never dreamed of before. 

Now, go forth and create your own original masterpiece!

My Favorite Fish Tacos

Fish Tacos with Mango Slaw

Fish Tacos with Mango Slaw

My first experience eating fish tacos was at a little restaurant called Rosy's at the Beach in Morgan Hill, California back in 1999. (They are still in operation, and the tacos were voted #1 by the San Jose Mercury News in 2016!) Being a Midwesterner, fish tacos didn't sound particularly appetizing, but one bite and I was "hooked"!  This is my version of fish tacos.  The tacos at Rosy's were made with corn tortillas, with a choice of grilled salmon, prawns, or ahi tuna, cabbage slaw, avocado, and salsa.  My version is made with flour or corn tortillas, seasoned broiled white fish (because it is readily available and affordable, but you could use any firm fish you like), a cabbage and mango slaw, and an avocado-lime crema, topped with cilantro and a little jalapeno if you want more heat. If you've never dared try one, make these.  I think this recipe will "reel you in".  Serves 4

For the fish:

1 pound of fish of your choice such as cod, pollock, etc. (You could also use ahi tuna, salmon or shrimp)

1/4 cup olive oil

2 canned chipotle peppers

1/2 teaspoon ancho chili powder

1 Tablespoon lime juice

1/2 teaspoon salt

1 jalapeno pepper, finely minced

1/4 cup cilantro leaves, minced

Place the fish in a 1-gallon self-sealing freezer bag.  Place the next 7 ingredients in a small food processor and blend 'til smooth. (Alternately, process with an immersion blender in a liquid measuring cup or in a blender.)  Pour over the fish in a one-gallon freezer bag.  Turn the bag to distribute the marinade over all surfaces of the fish.  Refrigerate for at least an hour, and up to six hours, turning occasionally.

When it's time to make the tacos, preheat the broiler to high.  Remove the fish from the marinade and shake off excess.  Place the fish on a sheet pan sprayed with non-stick spray.  Place under the broiler and broil until the fish is cooked through and not at all translucent, without turning.  Remove from the broiler and keep warm while assembling the tacos.

Make the slaw:

3 cups shredded cabbage

1 large mango, peeled, and cut into julienne strips

1/2 cup sliced green onions

1 jalapeno pepper, seeded and diced

1/2 cup cilantro leaves, roughly chopped

2 Tablespoons white vinegar

1 Tablespoon olive oil

1 teaspoon honey

1/2 teaspoon salt

Pinch of ancho chili powder

Place the cabbage, mango, onions, and jalapeno in a bowl.  Whisk together the remaining ingredients and pour over the slaw.  Toss to coat everything, cover bowl with plastic wrap or a lid and refrigerate until ready to serve tacos.

Make the Avocado-Lime Crema:

3/4 cup sour cream

1 medium avocado, pitted, flesh scooped out with a spoon

3 Tablespoons freshly-squeezed lime juice

Large pinch of salt

In the jar of a blender or small food processor combine all ingredients and process until smooth.  Store covered with plastic wrap pressed onto the surface of the crema in the refrigerator until ready to serve.

Assemble the Tacos:

8 6-inch flour or corn tortillas,  (I used 8-inch for those pictured above, but smaller is better!)

Heat a medium non-stick skillet over medium-high heat.  Spray lightly with non-stick spray.  Place the tortillas in the skillet, one at a time, and cook on each side until dark brown spots appear.  Stack in a large sheet of aluminum foil and wrap to keep warm while cooking the rest. (You could just warm them in the oven, but they taste raw and don't compliment the rest of the ingredients.  Take the time to grill them!)

Place a portion of fish on a tortilla, top with a generous amount of the slaw, and top with some of the crema.  Garnish with additional cilantro and chopped jalapeno, if desired.

Serve immediately.

Eve's Favorite Turkey Sandwich

Eve's Favorite Turkey Sandwich

Eve's Favorite Turkey Sandwich

This sandwich was one of the top three customer favorites at Feast of Eden Cafe!  Fresh multi-grain bread is slathered with "Birds & Bees Sandwich Spread", then layered with sliced turkey, red onion, bacon, and crisp spring greens. This sandwich achieves the perfect balance of sweetness, spiciness, and saltiness for many. Replace the cream cheese in the spread with 1/4-1/2 cup chicken broth and us it as a sauce for grilled chicken or pork.

For each sandwich:

2 slices fresh multi-grain bread

*Birds and Bees Sandwich Spread

4 ounces sliced deli turkey

3 strips crisp bacon, warm

One thin slice of red onion

Handful of crisp, dry spring greens

Lay out the bread on a work surface and spread generously with B&B spread.  Layer remaining ingredients in order on one slice of bread, then top with second piece of bread.  But in half and serve!

*Birds & Bees Sandwich Spread:

12 ounces apricot preserves                                          

1/4 cup honey

1/4 cup prepared horseradish (not sauce)                    

3 Tablespoons Dijon mustard

1/2 teaspoon dried thyme                                              

1/2 teaspoon crushed, dried red pepper

8 ounces cream cheese, use low- or no-fat if you prefer

Combine first 6 ingredients in a saucepan and bring to a boil.  Simmer for 3-4 minutes, stirring frequently.  Remove from heat.

Place cream cheese the bowl of a food processor (or mixing bowl if you don't have a food processor) and process until smooth.  With the machine running slowly drizzle the hot apricot mixture through the fee tube until everything is well-combined and smooth. (Alternately, mix with a mixer to achieve a smooth sauce.)

Store in a tightly-covered container and use within two weeks.

Mark's Favorite Pork Tenderloin Sandwich

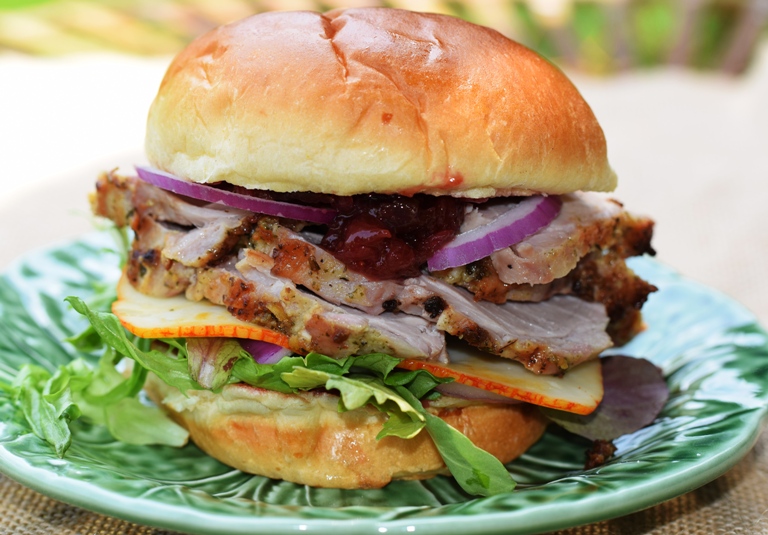
This sandwich is out of this world!  It was a favorite special and frequently requested.  This is a fabulous way to use left-over roasted pork tenderloin-it won't feel like leftovers at all!  The brioche bun is key, and Cherry-Rhubarb Chutney is what puts this sandwich head and shoulders above most!  Try it and you'll be hooked, for sure. Check out the video, too!

For each sandwich:

4 ounces Mustard & Herb Roasted Pork Loin, thinly sliced

1 Brioche bun

2-3 Tablespoons Cherry-Rhubarb Chutney

Red onion, thinly sliced

1 slice Muenster cheese

Small handful of spring greens

Spread Cherry-Rhubarb Chutney onto both sides of bun.  Place greens on the bottom bun, top with Muenster, then pork, finish with red onion.

Turkey Avocado Club Sandwich

Turkey Avocado Club ready for the plaste

Turkey Avocado Club ready for the plaste

With just two slices of bread, this is a slightly shorter club sandwich, but you will never miss that third slice of bread!  Swirled marble rye bread is lightly toasted, then one side is spread with Russian dressing and the other get a thick schmear of mashed avocado, (a method that evolved after serving it with sliced avocado, which tended to squirt out the side of the sandwich when eating!).  After that, layers of turkey, tomatoes, red onions, bacon, and Romaine are added.  This was a "Top-5" choice at the cafe, with good reason!

For each sandwich:

2 slices marble rye bread, lightly toasted

1-2 Tablespoons Russian dressing (see below)

2-3 Tablespoons mashed avocado (see below)

1 large lettuce leaf (Romaine, Bibb, or your favorite)

2-3 thin slices of tomato

Slice of red onion

3 ounces of deli turkey

2-3 slices crisply cooked bacon

Spread one side of the bread with Russian dressing, the other side with mashed avocado.  Add the lettuce, tomato, onion, turkey, and bacon to the bread with Russian dressing, then top with the avocado-covered bread.

Russian Dressing

Combine 1 cup of mayonnaise, 1/4 cup ketchup, 1 Tablespoon sweet pickle relish, about 4 dashes of Worcestershire sauce, and salt and pepper to taste.  Will keep for a couple of months in the refrigerator.

Mashed Avocado

Place a medium-sized avocado in a bowl, sprinkle with a little salt, and squeeze the juice of 1/2 lime over it.  Mash with a fork or potato masher.  Press plastic film firmly down onto the top of the avocado mixture if making ahead or to store any leftovers.  Contact with air causes the avocado to brown, so be certain there are no areas where the plastic is not in contact with the avocado.

Feast's Chicken Roll-up

Feast's Chicken Roll-Up made with deli roasted chicken

Feast's Chicken Roll-Up made with deli roasted chicken

This pretty rolled sandwich is truly lunch in your hand!  Perennially popular at the cafe, you have options when making them at home.  Use deli chicken or turkey, left-over grilled or roasted chicken, or make it vegetarian by replacing the chicken with grated carrot, sprouts, or any other favorite veggies.  The chicken gets rolled into a tortilla along with a creamy cheese and green onion spread, little tomatoes, thin slices of cucumber, and baby spinach, a lovely medley of flavors and textures.  They can be made the night before (they hold together better if they are refrigerated a few hours before eating) and tucked into brown bag lunches or taken on a picnic   Take these on your next big adventure!

12 ounces cream cheese, softened .

2 Tablespoons grainy Dijon mustard

3 ounces shredded Cheddar or Co-Jack cheese

1/4 cup thinly-sliced green onions

6 10-inch tortillas, plain, whole-grain, spinach or red pepper

24 ounces cooked chicken, shredded, or sliced deli chicken or turkey

18 cherry tomatoes, halved

6 cups baby spinach leaves

30 thin slices of cucumber

Combine the cream cheese and mustard in a food processor and process until smooth and creamy.  Add the cheese and onions and pulse until well combined. (Alternately, mix by hand with a fork in a medium bowl.)

Warm tortillas slightly to soften in a large skillet or over the open flame of a gas range prior to assembling.  Spread 1/6 of the cheese over the tortilla, top with a 4 ounce portion of the chicken, 6 cherry tomato halves, 1 cup spinach leaves, and 5 slices of cucumber.  Fold and roll up as for a burrito.

Securely wrap each sandwich in a sheet of deli paper or waxed paper and cut in half on the diagonal.  Serve immediately, or wrap each tightly in plastic wrap and store in the refrigerator for up to 8 hours.  Consume withing 24 hours of making.

Feast's Asian-Style Tuna Salad

Feast's Asian-Style Tuna Salad served as a sandwich with toasted whole-grain bread and thinly-sliced cucumbers.

Feast's Asian-Style Tuna Salad served as a sandwich with toasted whole-grain bread and thinly-sliced cucumbers.

This tuna salad is the result of wanting the flavors I love in sushi and Japanese dishes in an everyday tuna salad.  It was a favorite year-around at the cafe, especially during Lent and the hot summer months!  It makes a fabulous sandwich, but is equally wonderful served on a bed of lettuce garnished with cucumbers and a few radish slices for color.  Either way, it is addictive!

2/3 cup mayonnaise

2 Tablespoons pickled ginger, very finely minced

1 /2 teaspoon ground ginger

3/4 teaspoon sesame oil

1 Tablespoons wasabi powder

1 Tablespoon chili-garlic sauce

2 tablespoons seasoned rice vinegar

2 Tablespoons sweet chili sauce

1 Tablespoon soy sauce

4 whole green onions, thinly sliced

1/2 cup finely-diced celery

1/2 cup finely-diced daikon radish

2-9 ounce cans of tuna, well-drained

Combine mayonnaise, pickled ginger, ground ginger, sesame, oil, wasabi powder, chili-garlic sauce, seasoned riced vinegar, sweet chili sauce, and soy sauce thoroughly in a medium bowl. Taste and adjust to suite your taste.  Add the green onions, celery, radish, and tuna and combine well.  Refrigerate for one hour before serving to allow the flavors to marry.

Serve on toasted bread with cucumber slices or on a bed of lettuce with cukes and radishes.

Gourmet Grilled Cheese Sandwich with Red Onion Jam

Gourmet Grilled Cheese

Gourmet Grilled Cheese

This grilled cheese hits all of the right notes, and will remain in your memory forever!  Its complex and complementary flavors really do sing.  Pair it with a cup of soup or a salad, or both for lunch and you'll hear music the rest of the day!

For each sandwich:

2 slices sourdough or other crusty bread

Red Onion Jam

1 slice each, Cheddar & Muenster, or your favorites

3 slices crisp cooked bacon

Butter

To make sandwich:

Spread a thin layer of Red Onion Jam on each slice of bread.  Place two slices of bacon on one slice, top with cheese, and place third slice of bacon on top. Place second slice of bread on top and spread with butter. 

Place the sandwich on the panini grill, buttered side down, then butter the top slice of bread and close the grill.  Cook until the cheese begins to ooze out the sides a bit and the bread is a deep golden brown. 

Remove from the grill and allow to rest for a minute or two before cutting in half.  Serve immediately.

Feast of Eden's Cecily Sandwich

Cecily Sandwich

Cecily Sandwich

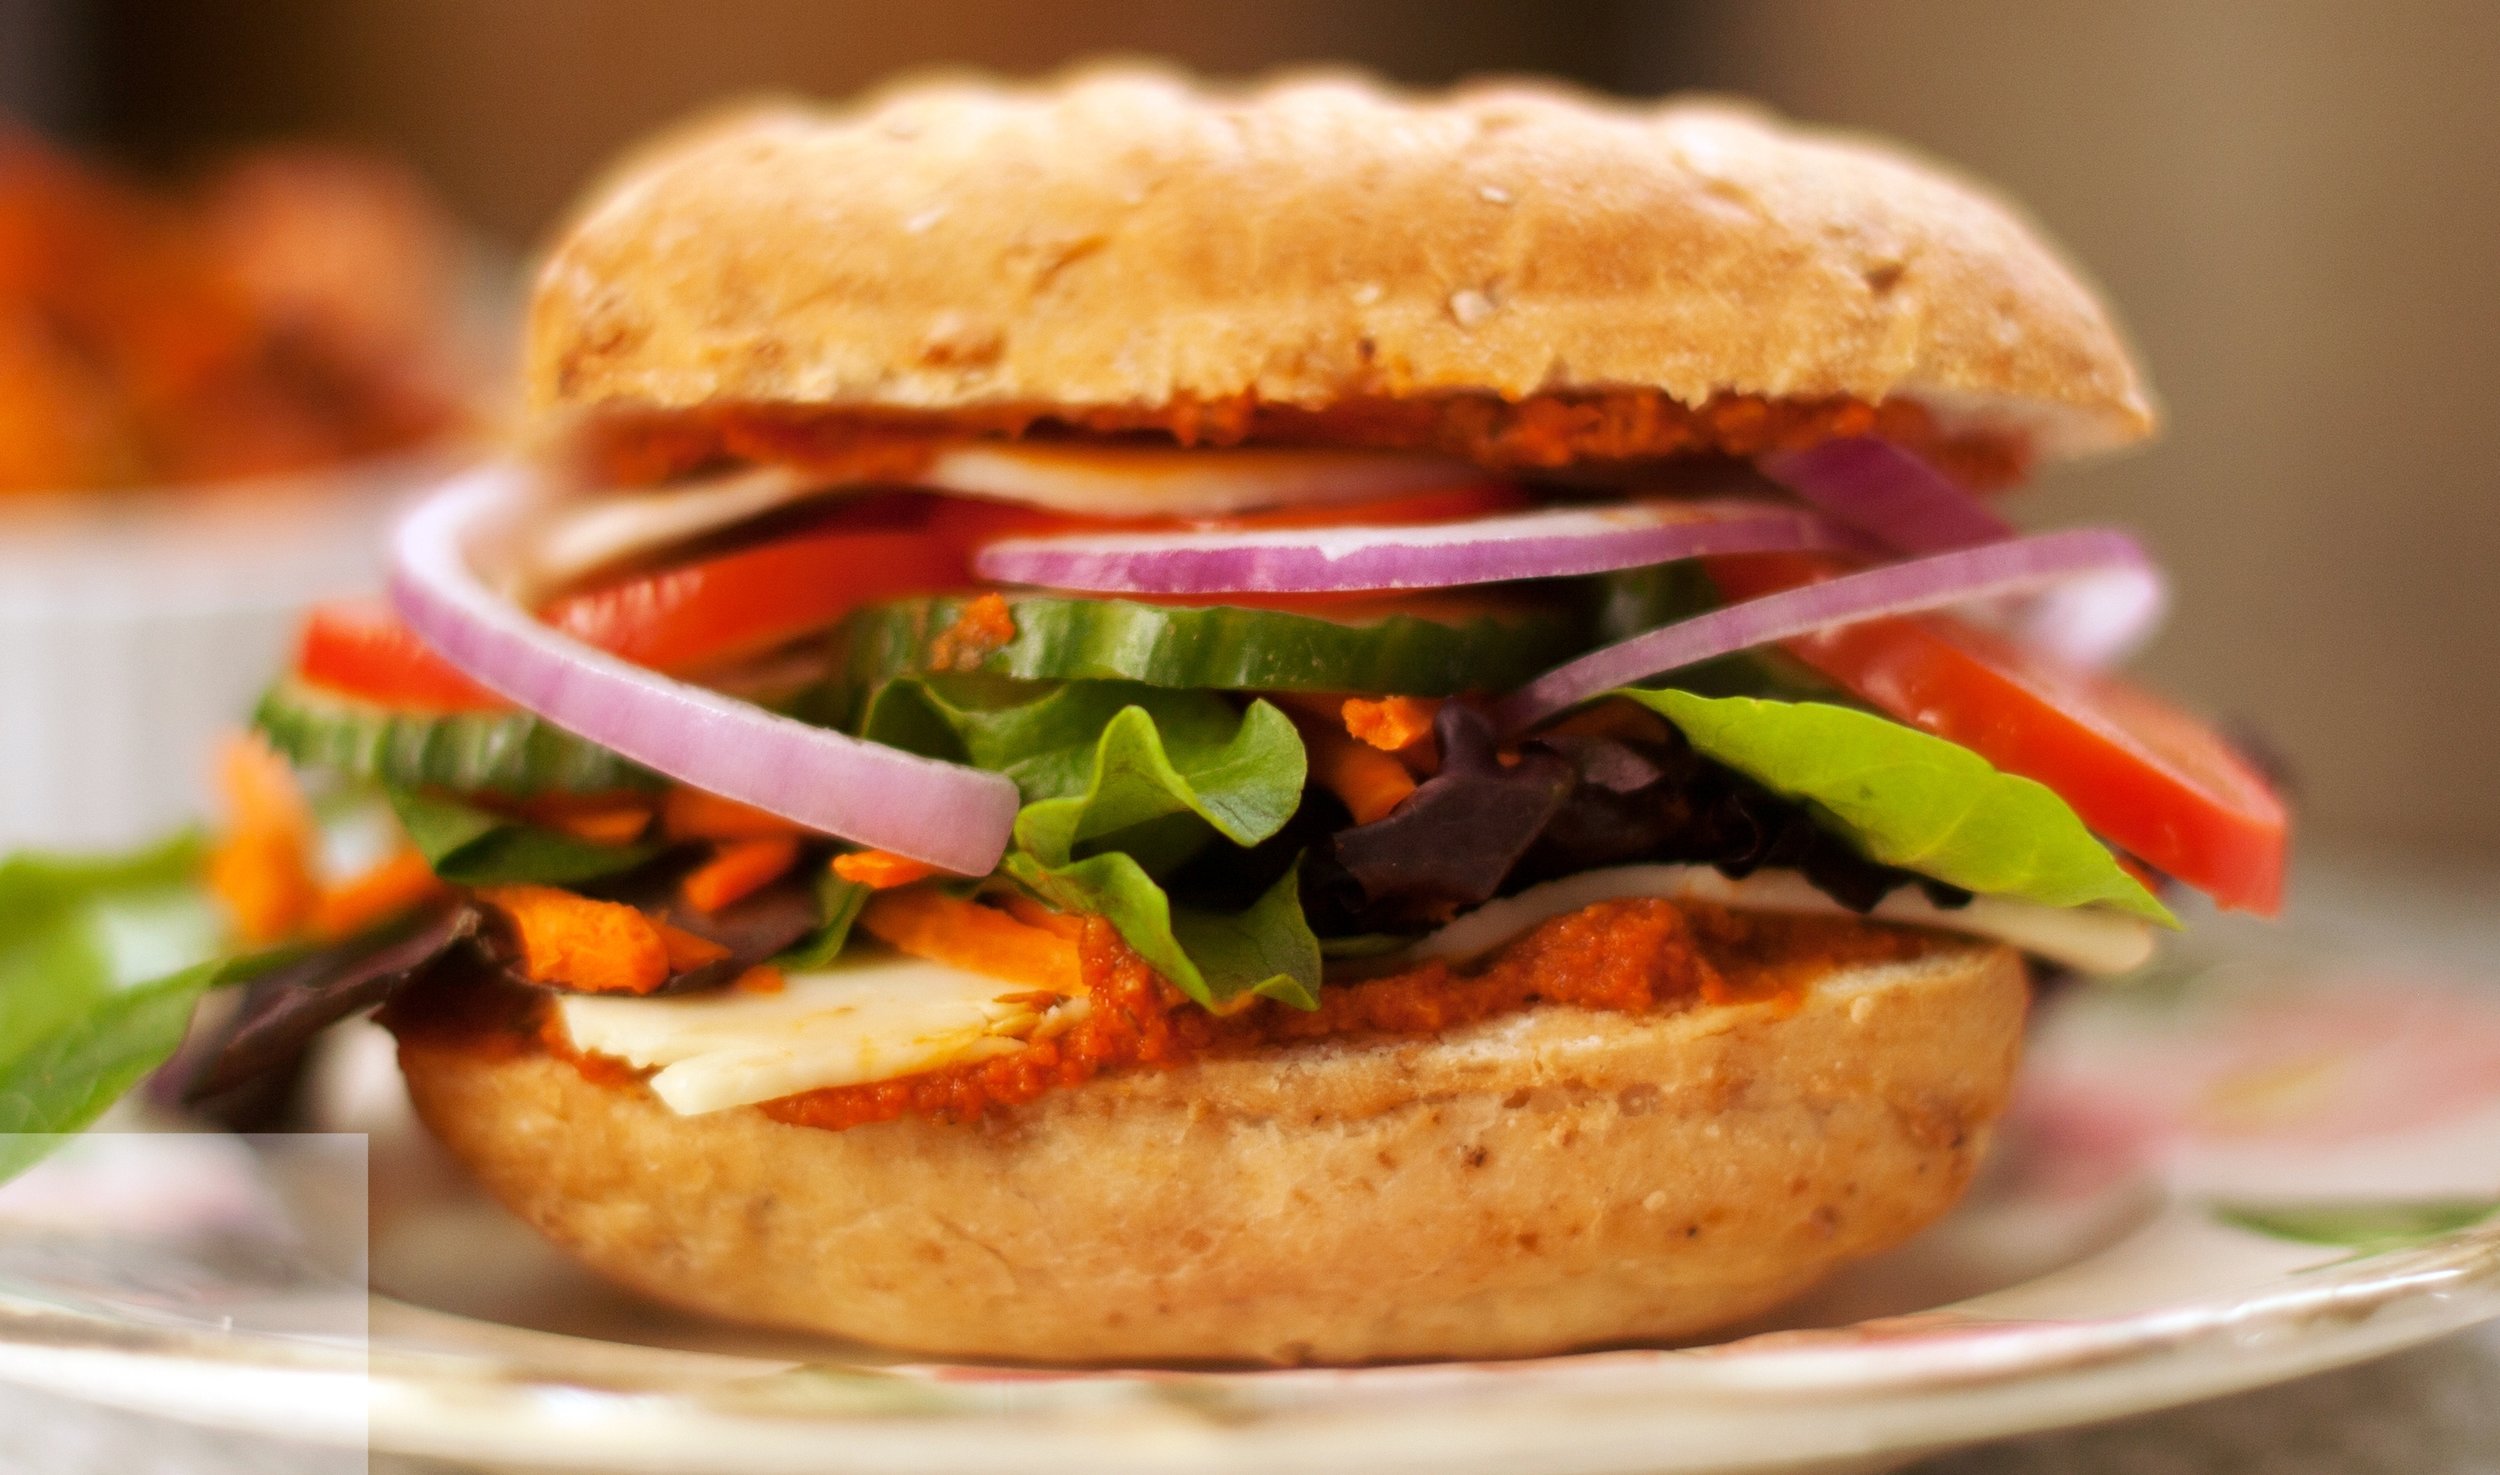
It was a surprise to me how beloved this vegetarian sandwich became at the cafe!  Our made-from-scratch ciabatta got a schmear of Roasted Red Pepper Hummus and was then layered with the customer's choice of cheeses, and a plethora of raw veggies. (Vegans just left off the cheese!)  One customer stated, "if this is what vegetarian tastes like, I think I could be one!".  Delicious!

For Each Sandwich:

1 Ciabatta Roll

2 slices cheese of your choice

Fresh vegetables: spring greens, red onion, shredded carrot, cucumber, spinach, tomato slices, mushrooms, sprouts, etc.  Use your favorites!

Cecily Dip & Sandwich Spread

Split the ciabatta roll and grill briefly in a panini grill or in a skillet until just slightly browned .  Spread both sides generously with the hummus, then layer on a slice of cheese, veggies, and the second slice of cheese, and put the ciabatta top on to finish.  Serve.

Turkey & Cranberry Panini

Turkey & Cranberry Panini

Turkey & Cranberry Panini

This panini is so delicious, and is the perfect way to make use of Thanksgiving's excess! A similar panini was served at the cafe; always a favorite! It starts with Pumpkin Yeast Bread that gets spread with Cranberry Sauce with Apricots & Sherry, some grainy mustard, roasted turkey, and your choice of cheese; I like to use Pepper Jack to give it a little zip and balance the sweetness of the sauce and bread. I suspect these may appear on the table all season long!

Equipment needed:  Panini Grill     or     12" Cast Iron Skillet and 10.25" Cast Iron Skillet

For each sandwich:

2 slices Pumpkin Yeast Bread

1 Tablespoon grainy brown or Dijon mustard

2 Tablespoons Cranberry Sauce with Apricot & Sherry

2-3 ounces roasted turkey, sliced thin and warmed in the microwave slightly

2 slices of cheese, Pepper-Jack, Co-Jack, Smoked Gouda, or your favorite

Softened Butter

Preheat the panini grill to high, or preheat the 12" skillet over medium heat.

Lay out the slices of bread on a cutting board or counter top.  Spread both sides very lightly with the mustard, then spread each slice with the cranberry sauce.  Add a slide of cheese to one slice, top with the turkey, then the second slice of cheese.  Top with the remaining slice of cheese.  Spread both side of the panini with butter and place on the panini grill (or add to the skillet.  Carefully close the lid, making sure the sandwich remains level, or place the smaller skillet on top of the sandwich in the skillet, keeping it level. (For the skillet panini: Once the bread has browned well on one side in the skillet, turn the sandwich, cook until the cheese melts and the panini is brown on the other side.)  When the panini is well browned and the cheese is melted, remove to a cutting board and allow to rest for about a minute before cutting on the diagonal.  Serve immediately.

Barbecue Beef Brisket Sandwiches

Barbecue Beef Brisket Sandwich with Sweet Potato Strings and Fresh-Pack Dill Pickle

Barbecue Beef Brisket Sandwich with Sweet Potato Strings and Fresh-Pack Dill Pickle

This beef brisket is amazing!  At the South Bend Farmers Market we sold it by the pound, and we ran out every week.  It is one of my favorite sandwiches.  Cooked low and slow until the meat falls apart, it is bathed in Farmers Market Barbecue Sauce, resulting in a complex, tender, addictive barbecue.  This is a must try!

6 pounds Beef Brisket, flat half, trimmed of excess fat

3 Tablespoons Creole seasoning (I use Tony's)

4 teaspoons Kosher salt

2 Tablespoons vegetable oil

4 cups+ 2 cups Farmers Market Barbecue Sauce

2 cups low-sodium beef broth

Onion or regular buns

Preheat the oven to 325-degrees.

Combine the salt and Creole seasoning in a small bowl.  Rub both sides of the brisket liberally with the salt mixture.  Cut the brisket into 8-10 pieces.

Heat the oil in a large skillet over fairly high heat.  Brown well all of the pieces of brisket on both sides.  Place in a large, lidded container that is oven-proof. 

Combine 4 cups of the barbecue sauce and broth in a large bowl.  Pour over the brisket, cover the pan tightly with foil, and put the lid on the pan.  Bake for 2 1/2 hours.

Remove the meat from the oven and turn all of the pieces over, cover again, and continue cooking for an additional 2 1/2 hours, or until the brisket is fork tender.

Remove from the oven and let stand for 15 minutes.  Slice the pieces thinly against the grain and place in a large pot or crock pot.  Add the remaining barbecue sauce and enough of the cooking liquid to nearly cover the meat.  Simmer for an additional hour, uncovered, stirring occasionally until the meat is shredded and tender and the liquid has reduced.

Serve on toasted onion or regular buns.  (In the South, cole slaw is served atop the sandwiches-so tasty!)

Cain & Abel Panini

Cain & Abel Panini

Cain & Abel Panini

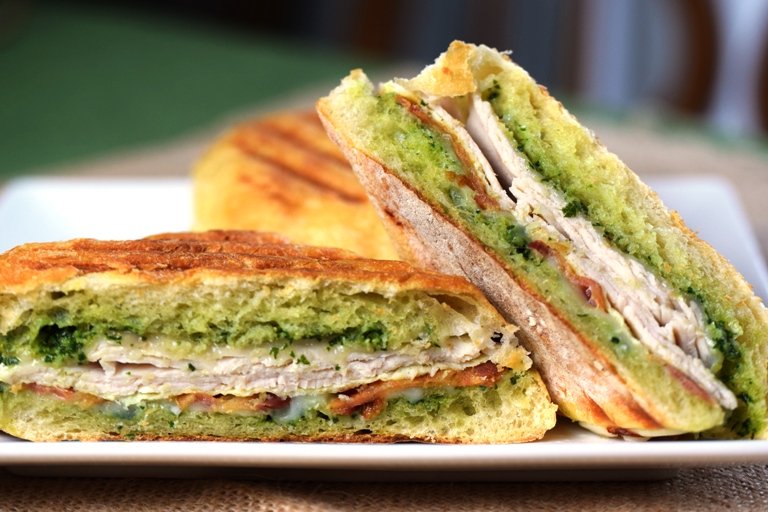
This panini was such favorite at the cafe!  The Italian flavor profile, crunch, and the unusual addition of an egg crepe really set this hot sandwich apart.  While delicious heirloom tomatoes are in season I have been adding a slice to this sandwich with fabulous results!  (In winter, no tomato is better than a flavorless one, is my motto!) A cup of Italian Vegetable Soup with Brown Rice is the perfect side!  I know you will love this panini.

For each panini:

1 Italian Ciabatta roll

Basil Pesto, 2 Tablespoons, or to taste

2 slices Provolone Cheese

1 Egg Crepe (see recipe below)

2 slices fairly thick-cut bacon, cooked crisp

2 ounces deli roasted turkey breast, thinly sliced

Olive oil spray

Heat a panini grill to high heat.  (If no panini grill is available, heat a cast iron skillet to high, and have a second, heavy skillet on hand.)

Lay out the ciabatta roll and spread both sides with a thin layer of the basil pesto.  Add a slice of cheese to each.  Layer the egg crepe, bacon, and turkey on the bottom piece of the ciabatta and lay the other half on top, pressing down slightly.  Spray the top of the ciabatta lightly with the olive oil spray.

Place the sandwich on the grill, making sure when it closes that the sandwich is pressed evenly.  (Or, lay the sandwich in the skillet and top with the second skillet. Once the bottom is browned and the cheese melts, flip the panini and finish cooking the other side, still pressed with the second skillet.)  When the panini is a deep golden brown and the cheese is oozing out the sides, it is ready to come off.  Let it cool for a minute or two, then cut on the diagonal and serve.

Egg Crepes:

1 extra-large egg

1 Tablespoon milk or cream

Preheat a small (6-7") non-stick skillet over low heat.  Spray with non-stick spray, or brush with butter, liberally.

Beat the egg and cream together until it uniformly yellow, with no streaks or lumps.  Pour just enough of the egg mixture into the skillet (rotate the skillet) to allow the egg to cover the bottom thinly.  Cook until the top is set, then flip, using tongs.  Almost immediately the egg will be set, so turn it out onto a plate or piece of deli paper.  Continue with the remaining egg mixture; you should get 4 crepes.  Cool.  (Crepes may be layered between sheets of plastic wrap or wax paper, wrapped in plastic wrap, and frozen.  Use within one month.)

Feast of Eden's Figgy Piggy Panini

The Figgy Piggy Panini

The Figgy Piggy Panini

Figs are one-of-a-kind edibles and available for a very short time each year.  To make the most of fig season I try to get them into as many sweet & savory dishes as possible.  This is a fabulous panini; you will just have to try it, as words fail me!

For each sandwich:

2 slices sourdough bread

1 teaspoon Dijon mustard

2 slices Provolone or Muenster cheese

1 large, whole, fresh fig, sliced very thinly lengthwise

3 slices crisply cooked bacon

Melted butter, for brushing onto panini

Preheat a panini grill to High. (No panini grill?  Heat a cast iron skillet on medium-high and have another, smaller skillet on hand to press the sandwich.) 

Lay bread out on a cutting board or counter.  Spread one slice of bread very thinly with Dijon mustard, using as little as possible while creating an even layer.  Place a slice of cheese on the slice of bread with mustard. Place the fig slices on top of the cheese, then lay the bacon on top of the figs. Place second slice of cheese atop the bacon, then place the second slice of bread on top of all.  

Brush liberally with melted butter, making sure the surface is completely coated, on both sides.  Place sandwich on the grill and close carefully, making certain everything is laying flat on the grill. ( If using a skillet, place the sandwich in the pan and weigh down with a smaller skillet. When the bottom is a deep golden color, flip the sandwich, replace the skillet and continue cooking until it is well-browned.)  Cook until the sandwich is a deep golden brown and all of the cheese has melted.  Remove from the grill or skillet and allow to rest for a minute or so before serving.

P.S.  This makes a hearty, filling breakfast sandwich.  Make one & share half!