July Edition

Happy July!

It is the height of summer, and there is so much fun to be had!  July affords many opportunities to get together with loved ones and friends. Cookouts, picnics, showers, and reunions abound;  sharing good times and your favorite dishes highlight them all.  This is a great time of year.

Barry and I will soon be on our way to Indiana for our annual "Thanksmas" celebration.  What is that, you ask?  Our family started a tradition of celebrating Thanksgiving and Christmas in July when the weather is good for travel and the multitude of adults, children, and dogs can have the run of the family farm!  And there will be fireworks!  My brother is expert, and with help from a few family members puts on a show that rivals some professional displays! It will be a great time for young and old alike.  We all bring our favorite summer dishes, which are varied and delicious.  What's on the menu for your summer outings?  I think you might find some ideas here!

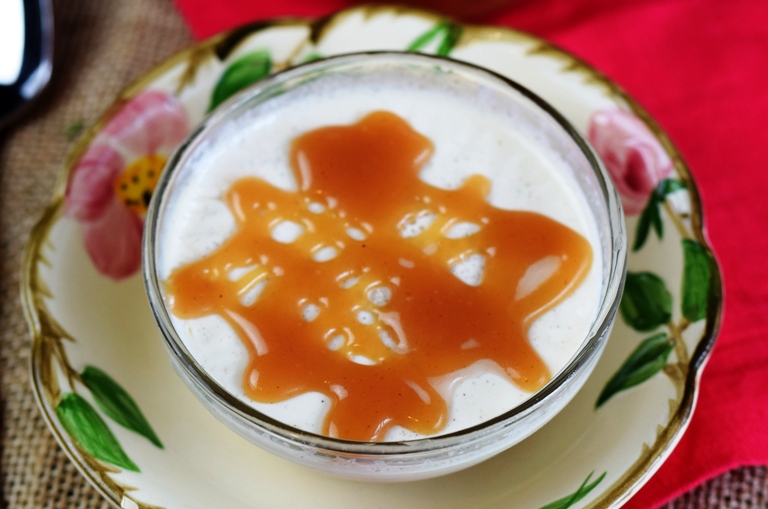
The July edition contains recipes to make your events fabulous!  Marinated Grilled Chicken Breasts are a nice change from burgers and dogs, and leftovers are spectacular in salads and sandwiches.  Pair it with my Summer Pasta & Veggie Salad. It's bright, clean, refreshing flavors are perfect with all grilled dishes.  Of course there must be dessert, and Independence Day Cheesecake or Summertime Fresh Blueberry Pie will please your most discerning guests! (Watch the video for making and rolling out Basic Pie Crust-flaky, golden, and delicious! You will be shocked at the surprise ingredients!)  And you will love the way my Whipped Cream That Won't Fall Flat stands up to the warm weather on top of a pie, cheesecake, or any other dessert!

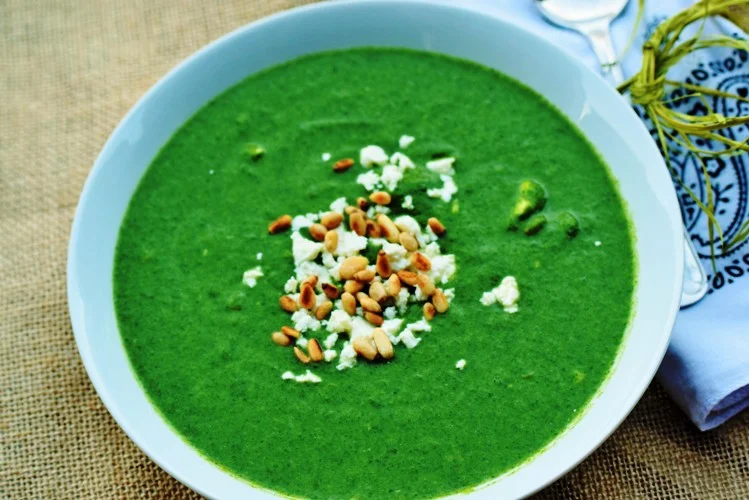
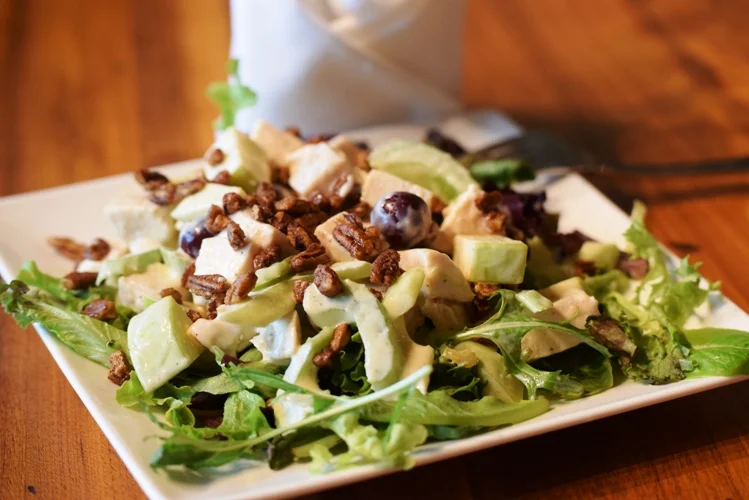
If you're having a breakfast or brunch gathering, then Lemon-Blueberry Sour Cream Muffins are a must! So tender and moist, they won't last long.  And Feast of Eden's Chicken Salad with Farmhouse Brioche on the side will make your showers, luncheons, or weekend lunches memorable.  On those days when the weather cools a bit, whip up some Spinach & Feta Soup, delicious with an Eve's Turkey Sandwich.

Find inspiration and ideas on the site including lemon flowers and flavored syrups for beverages.  All of the other tempting recipes will be oh-so-good for any event!  Be sure to check out the videos, Chef's Notes, and answers to Ask the Chef; as there are new posts going up all the time! 

We are just getting the ball rolling, with many great things ahead.  Thank you for being a part of Feast of Eden Cooks at Home's amazing family!  And until next time.......

I'll see you all later, hungry!

Fresh Plum Salsa

Fresh Plum Salsa

Fresh Plum Salsa

Plums may seem like an unusual base for a savory salsa, but they totally work in this delicious condiment.  The perfect accompaniment to Chicken Paillards or any kind of grilled or baked chicken or fish.  Honestly, it is tasty enough to eat with a spoon!

1 cup fresh plums, pitted and chopped

1 cup mango, peeled and chopped

1 cup red onion, minced

1 cup red bell pepper, seeded and chopped

1 large Jalapeno pepper, seeded and minced

1/4 cup chopped fresh cilantro

2 Tablespoons fresh lime juice

1/4 teaspoon lime zest (skin only, no white)

1 teaspoon red wine vinegar

1/4 teaspoon ground coriander

1/2 teaspoon salt

Combine all ingredients well.  Cover and refrigerate for several hours to allow the flavors to blend. It is best to allow the salsa to come to room temperature before serving.  Store in the refrigerator.

Herb Marinated Fresh Mozzarella

Herb Marinated Fresh Mozzarella

Try this delicious combination of Fresh Mozzarella and Fresh Herbs with a little oil, balsamic and seasonings as an appetizer at your next get-together (or for an evening relaxing!).  Make it a few hours ahead and serve it with toothpicks; it doesn't get any easier than this!  Click on the picture to get the recipe!  Also, there are plenty of free, printable recipes available, so take a look at the website!

Fresh Herb Dip with Crudites'

Fresh Herb Dip with Crudités

Fresh Herb Dip with Crudités

This was a "go-to" recipe for so many catering events; and it still is for just about any kind of get-together! The flavor is bright from the lemon, and all of the herbs complement each other beautifully.  Make it several hours ahead or the day before to allow the flavors to marry. If you're pressed for a quick salad dressing, thin it with a bit of butter milk; it's delicious on a baked potato, too!  You will find many ways to enjoy this dip, I have no doubt! It is easily doubled or tripled for a crowd.

8 Ounces Cream Cheese, at room temperature
1/2 Cup Sour Cream or Plain Greek Yogurt (very Thick)
1/2 Cup Mayonnaise (may use reduced-fat, but not fat-free!)
4 Green Onions, finely minced
2 Tablespoons Minced Fresh Parsley
1 Tablespoon Minced Fresh Dill Weed
1/4 Teaspoon Kosher Salt
1/8 Teaspoon Black Pepper, freshly ground
1 Teaspoon Natural Seasoning without salt (I use Trade East brand)
1 Tablespoon Fresh Lemon Juice

1.    Combine cream cheese, sour cream and mayonnaise in a a mixing bowl (or stand mixer) and beat until completely smooth. (You could also do this part in a food processor.) Make certain the ingredients are completely smooth.  Transfer mixture to a mixing bowl if using a food processor.

2.    Add remaining ingredients and stir until thoroughly combined.  

3.    Transfer to a covered container and store in the refrigerator for up to 7 days.


Caramel Candy

Homemade Caramel Candy has many uses!  See the video for detailed directions.

Homemade Caramel Candy has many uses!  See the video for detailed directions.

This candy is not at all difficult to make, and has so many uses!  It makes a great gift, wrapping the squares of candy in waxed paper squares.  It is also the base for caramel sauce, and as a filling in Salted Caramel Cookie Bars.  I adapted this recipe from Martha Stewart's original.

2 cups heavy cream

2 1/4 cups sugar

6 Tablespoons unsalted butter, cut into pieces

1 1/4 cups light corn syrup

1/2 teaspoon coarse salt

1/2 teaspoon pure vanilla extract

Lightly oil or spray with non-stick spray a 9 X 9-inch metal baking dish.  Line the pan with parchment paper, leaving an overhand on two sides (to lift out the caramel after it hardens).  Oil or spray the parchment paper, as well.

Place the cream, sugar, butter, and corn syrup in a very large (4 quart) heavy saucepan.  Bring to a boil over high heat, stirring slowly until sugar melts.  Once mixture comes to a boil, cover with a lid and allow to cook for a minute, covered.  (The steam inside the pan will melt any sugar that might be stuck on the sides of the pan which could crystallize.)  Cook over medium-high heat, stirring occasionally, untilcaramel reaches 248-degrees on a candy thermometer or instant-read thermometer, about 15 minutes or so.

Remove the pan from the heat and stir in the salt and vanilla.  Pour the caramel into the baking pan and let stand, uncovered, at room temperature for 8 hours, and up to one day.

Lift the caramel out of the pan with the parchment paper and place on a large cutting board.

Cut into 1 X 1-inch pieces to use as candy.  Cut into nine square pieces and layer with wax paper, then wrap in plastic wrap to use as a base for other recipes.  Candy will keep at room temperature for a month.

Light Vanilla Panna Cotta

Light Vanilla Panna Cotta

Light Vanilla Panna Cotta

This is a go-to summer dessert!  Low in fat (you don't have to make it low fat, as you can use cream in place of the evaporated milk and whole milk, if you choose), this is so easy to make in the morning and end dinner with!  No real cooking required, just heat the milk in the microwave until it steams to dissolve the gelatin.  Top it with my Caramel Sauce (shown), chocolate sauce, berries, or serve it plain for a creamy, cool, delightful dessert. (The recipes for making caramel and caramel sauce will be available in the August edition!)

2 1/2 teaspoons unflavored gelatin (1 packet)

1/2 cup sugar

12 ounces evaporated non-fat milk

12 ounces skim milk

1 whole vanilla bean, split, seeds scraped out (or use 1 teaspoon vanilla extract, if you don't have a vanilla bean)

Combine all ingredients including the seeds and pod of the vanilla bean in a large glass microwave-proof bowl and stir well, so that the gelatin starts to soften. (Don't add the vanilla extract now if you are using that instead of the vanilla bean.)  Let the mixture sit for 15 minutes. 

Place the mixture in the microwave and heat for 4-5 minutes until very hot and steaming (no need to boil).  Strain through a fine mesh strainer into a 4-cup glass measure with a spout.  If you are using vanilla extract add it now. (If you are using extract, you can heat it in the measuring cup and skip the straining step.)

Pour into 6 custard cups placed on a sheet pan and allow to cool to room temperature.  Cover all tightly with plastic wrap and refrigerate at least 4-6 hours.

Serve "as-is" in the cups, or you can invert the panna cotta onto a serving plate for a more formal presentation.  (Wrap a hot, wet dish towel around the cups to loosen the panna cotta, cover with the plate, and flip it over.)  Drizzle with caramel or chocolate syrup, top with berries, or serve plain.  All variations are delicious!

Spinach & Feta Soup

Spinach & Feta Soup

Spinach & Feta Soup

This was a favorite soup of so many cafe' customers! The original recipe comes from one of my favorite soup cookbooks, The New England Soup Factory Cookbook-this is my version.  The bright green color and complex flavors cause even spinach-haters to become fans. You can use fresh spinach, but I find using the frozen stuff causes the soup to retain its bright green color much better!
3 Tablespoons Butter
4 Whole Cloves Garlic, peeled
1 Large Spanish Onion, peeled and dice
3 Ribs Celery, diced
4 Large Yukon Gold Potato, peeled and cubed
6 Cups Chicken Stock
1 Cup White Wine
1/2 Teaspoon Ground Nutmeg
2 Pounds Frozen Chopped Spinach, thawed, not drained
2 Cups Half and Half
1 Cup Crumbled Feta Cheese
1/4 Cup Pine Nuts, toasted, (reserved some for garnish, if desired
1 Teaspoon Worcestershire Sauce, or to taste
Kosher Salt and Ground Black Pepper, to taste

In a stock pot, melt the butter over medium-high heat.   Add the garlic, onion and celery.  Sauté for 5 minutes.  Add the potatoes and sauté for an additional 5 minutes.  Add the stock and wine.  Bring to a boil. Reduce the heat to medium and simmer until the potatoes are very soft and tender, 30-35 minutes.  Add the nutmeg and spinach.  Stir in well. Remove from the heat and puree with a hand-held blender until very smooth. (Use a regular blender if you haven't an immersion blender.  Do it in batches, being careful not to overfill and holding a kitchen towel over the top while processing.)

Stir in the cream, cheese, pine nuts, Worcestershire sauce, salt, and pepper.  Return the pot to the stove and simmer an additional 5 minutes.  Adjust seasonings.

Garnish each serving with additional crumbled Feta cheese and a few pine nuts, if desired.

Feast of Eden Chicken Salad

Feast of Eden Chicken Salad

Feast of Eden Chicken Salad

I adore this salad!  It's the perfect summer lunch, lovely to behold and beyond delicious.  It's so easy to prepare; chunks of roasted chicken breast, tart apples, sweet grapes and crunchy celery are tossed together and then bathed in a unique dressing flavored with Major Grey's Mango Chutney.  This salad flew out of the cafe when it was on the menu, and is perfect for showers, ladies luncheons, and casual weekend get-togethers.  I have no doubt it will become one of your go-to summer salads as well.

Serves 6

5 cups 3/4"-inch diced roasted chicken breast*

2 1/2 cups sliced celery

2 cups 1/2"-diced Granny Smith apple

1 cup seedless red grapes, halved

Dressing:

1/3 cup Major Grey's Mango Chutney

1 Tablespoon white wine vinegar

1 teaspoon Dijon mustard

1 Tablespoon Honey

Big pinch cayenne pepper

1 1/4 cups good quality mayonnaise

(Salt & pepper to taste, if needed)

For Serving:

Crisp, dry spring greens

1 cup Sweet & Spicy Salad Nuts

Combine chicken, celery, apples & grapes in a large bowl.

In a medium bowl, combine the next six ingredients and whisk together until very well combined.  Add salt and pepper to taste, if needed.

Add dressing to chicken mixture and toss until well combined.  Cover and chill until ready to serve.

When ready to serve, line plates with salad greens and place about 1 1/2 cups salad on top.  Sprinkle with nuts and serve.

*Quick Roasted Chicken Breasts

2-3 large boneless, skinless chicken breasts

Olive oil

Salt and Pepper

Preheat oven to 400-degrees F.

Lightly poundchicken breasts between sheets of plastic wrap with a meat mallet or rolling pin to about 1-inch thick .  Rub all over with olive oil and sprinkle with salt and pepper on both sides.

Place on a rimmed baking sheet that has been lightly oiled.  Bake to an internal temperature of 155-degress, or until the chicken is solid and pushes back when pressed with a finger.  Remove from oven and allow to cool completely before dicing and refrigerating.

Summer Pasta & Veggie Salad

Summer Pasta & Veggie Salad

Summer Pasta & Veggie Salad

This is a fabulous summer salad and was so popular with the cafe customers.  It is clean, fresh, and keeps for up to a week in the refrigerator. It's the perfect dish to take to a cookout, too. Substitute quinoa, corn or rice pasta if you want to eliminate the gluten!

8 servings

6 ounces farfalle (bow-tie) pasta

6 ounces cavatappi or other spiral pasta

6 Tablespoons extra-virgin olive oil

6 Tablespoons red wine vinegar

2 teaspoons fresh thyme leaves, finely chopped

Salt and Pepper to taste

2 medium carrots, halved and sliced 1/2" thick

2 stalks celery, with leaves, cut into 1/2 " dice

1 cup red onion, 1/2 " dice

2 medium red bell peppers, seeded and cut into 1/2" dice (see video)

Fill a large pot with water and bring to a boil.  Add 1-2 Tablespoons salt, until it tastes slightly salty (like sea water).  Cook pastas by placing the longest cooking pasta in first and bringing to a boil.  Cook until the time left is the required time for the remaining pasta to cook and add it to the pot.  Cook until both are just done.  (The farfalle I use requires 15 minutes to cook, and the cavatappi requires 9 minutes.  I started the farfalle, cooked it for 6 minutes, then added the cavatappi and finished cooking both for 9 minutes.  This eliminates having to do it in two batches!) 

Drain the pasta well in a colander and dump it out onto a sheet pan.  Drizzle with 1 Tablespoon of the olive oil and toss until it is all coated. Sprinkle with a little salt and pepper. Let cool on the counter briefly, then refrigerate or place in the freezer until it is completely cold.

Meanwhile, whisk together the remaining 5 Tablespoons of olive oil, red wine vinegar and thyme in a very large bowl. Add a large pinch of salt and pepper.  Add the vegetables and stir to coat.  Add the pasta and combine well. Adjust salt and pepper to suit your taste.

Refrigerate for at least an hour before serving to allow flavors to develop.

Farmhouse "Brioche" Dinner Rolls

Tender Farmhouse Brioche Dinner Roll alongside Feast of Eden's Chicken Salad

Tender Farmhouse Brioche Dinner Roll alongside Feast of Eden's Chicken Salad

I grew up eating "Aunt Tootsie Rolls" made by my Aunt Clara, whom we affectionately referred to as Aunt Tootsie.  This is my take on those rolls.  Because of the butter, I think of them as kin to brioche.  Brioche is made with cold butter, but this recipe uses melted butter and then the dough is chilled, which firms it up in the dough.  My children and grandchildren require these rolls at any family dinner!

Makes 12 large rolls, recipe can be doubled!

1/2 cup milk, warm

4 ounces (1 stick) unsalted butter, barely melted

1/4 cup sugar

1/2 teaspoon salt

1 extra-large or 2 medium eggs, at room temperature, lightly beaten

1 package instant yeast

2-2 1/4 cups flour, plus more for rolling

One stick of salted butter

Place all ingredients, except for the flour, in the bowl of a stand mixer and combine until well blended.  Slowly add the flour, about a half cup at a time, just until the dough is no longer sticking to the side of the bowl (dough will be very soft and sticky).

Grease a large mixing bowl and scrape the dough into it, turning it over to grease the top.  Cover tightly with plastic wrap and refrigerate for at least 8 hours and up to two days.

When ready to shape and bake, melt remaining stick of butter.  Flour the counter or a large wooden cutting board (my preference) and place the chilled dough on it.  Shape the dough with floured hands into a round ball.  Flatten and flour the dough into a disc then roll with a rolling pin into a (approximately) 14-inch circle, turning the dough over and lightly flouring as needed.  Quickly brush the melted butter generously all over the dough.  Using a floured pizza cutter or very long chef knife, cut the dough into 12 pie-shaped pieces, flouring the cutter between passes.  (Easiest way to get evenly-sized pieces is to cut in half, then in quarters, then cut each quarter into thirds!)

Starting at the wide end, roll each piece of dough up, and bend into a crescent shape.  Place on a greased or parchment-lined sheet pan, leaving at least 2 inches between the rolls to allow for rising.  When all of the rolls are shaped, brush them all over with the remaining melted butter.

Cover loosely with plastic wrap and place in a warm spot to rise until they are double in size.

Preheat the oven to 375-degrees.  The oven rack should be in the center or top third of the oven. Bake the rolls until they are a deep golden brown all over, 10-15 minutes or more, depending on your oven. (Keep your on eye on them, checking after 10 minutes.) Remove from the oven and transfer rolls to a cooling rack.  Serve warm. 

(These rolls can be made in advance, cooled completely, frozen, then thawed and warmed before serving. A great do-ahead for holiday meals!)

Eve's Favorite Turkey Sandwich

Eve's Favorite Turkey Sandwich

Eve's Favorite Turkey Sandwich

This sandwich was one of the top three customer favorites at Feast of Eden Cafe!  Fresh multi-grain bread is slathered with "Birds & Bees Sandwich Spread", then layered with sliced turkey, red onion, bacon, and crisp spring greens. This sandwich achieves the perfect balance of sweetness, spiciness, and saltiness for many. Replace the cream cheese in the spread with 1/4-1/2 cup chicken broth and us it as a sauce for grilled chicken or pork.

For each sandwich:

2 slices fresh multi-grain bread

*Birds and Bees Sandwich Spread

4 ounces sliced deli turkey

3 strips crisp bacon, warm

One thin slice of red onion

Handful of crisp, dry spring greens

Lay out the bread on a work surface and spread generously with B&B spread.  Layer remaining ingredients in order on one slice of bread, then top with second piece of bread.  But in half and serve!

*Birds & Bees Sandwich Spread:

12 ounces apricot preserves                                          

1/4 cup honey

1/4 cup prepared horseradish (not sauce)                    

3 Tablespoons Dijon mustard

1/2 teaspoon dried thyme                                              

1/2 teaspoon crushed, dried red pepper

8 ounces cream cheese, use low- or no-fat if you prefer

Combine first 6 ingredients in a saucepan and bring to a boil.  Simmer for 3-4 minutes, stirring frequently.  Remove from heat.

Place cream cheese the bowl of a food processor (or mixing bowl if you don't have a food processor) and process until smooth.  With the machine running slowly drizzle the hot apricot mixture through the fee tube until everything is well-combined and smooth. (Alternately, mix with a mixer to achieve a smooth sauce.)

Store in a tightly-covered container and use within two weeks.

Lemon-Blueberry Sour Cream Muffins

Lemon-Blueberry Sour Cream Muffins

Lemon-Blueberry Sour Cream Muffins

Lemons and blueberries love each other, and this muffin is the perfect place to bring them together. Perfect for a coffee or tea break, or on a brunch buffet, these are irresistible!

Makes 18 muffins

6 ounces unsalted butter, at room temperature

1 1/2 cup sugar

3 extra-large eggs, at room temperature

1 teaspoon vanilla extract

1/2 teaspoon lemon extract

1 Tablespoon lemon zest

8 ounces sour cream (not light!)

2 Tablespoons lemon juice

2 Tablespoons milk

2 1/2 cups flour

2 teaspoons baking powder

1/2 teaspoon baking soda

1/2 teaspoon kosher salt

2 cups fresh blueberries*

Preheat the oven to 350-degrees.  Place liners in 18 muffin cups and then lightly spray the top of the muffin pan with non-stick spray so muffins will come out easily.

In the bowl of an electric mixer fitted with a paddle attachment, cream the butter and sugar until light and fluffy, 4-6 minutes.  Reduce mixer speed to low and add the eggs, one at a time, then add the extracts, zest, sour cream, lemon juice, and milk, mix until well combined (mixture may look curdled, that is okay!).  In a separate bowl, whisk together the flour, baking powder, baking soda, and salt.  With the mixer on low speed (you don't want to wear the flour!), add the flour mixture to the creamed mixture and mix just until combined; don't over mix.  Fold in the blueberries by hand with a rubber spatula, being gentle, but making sure they are evenly distributed in the batter.

Using an ice cream scoop, fill each cup about 3/4 full.  Bake for 20-25 minutes (rotate pans after 15 minutes), until the muffins are lightly browned on top and a toothpick comes out clean.  Remove from the oven and let sit for 5 minutes before turning out onto a cooling rack.

*When fresh blueberries are unavailable, use frozen.  Place them in a strainer while still frozen and give them a quick rinse under cold water, then spread out on paper towel to drain. (They should still be frozen solid when added to the batter.) Continue with recipe, but let the muffins sit at room temperature for 20 minutes before baking.  Baking time may be a bit longer.  If they begin to brown too much before they are baked, reduce the oven temperature to finish baking.

Marinated Grilled Chicken Breasts

Marinated Grilled Chicken Breasts

Marinated Grilled Chicken Breasts

Grilling imparts so much flavor to everything, but it is especially useful when using chicken breasts.  Pounding them to an even thickness means they cook evenly on the grill.  And since chicken breasts have very little fat, and consequently flavor, a little help is needed.  This marinade does the trick and yields moist, flavor-filled breasts with a little smokiness from the grill.  This is definitely a go-to recipe!

6 Boneless, skinless chicken breasts, flattened to an even 1-inch thickness

1/3 cup lemon juice

1/2 cup olive oil

1 Tablespoon salt

2 teaspoons ground black pepper

l teaspoon finely minced fresh thyme

1 teaspoon finely sliced fresh chives

1/2 teaspoon finely minced fresh rosemary

(To pound chicken, place each piece between two sheets of plastic wrap and pound lightly with a meat mallet or rolling pin until the piece of chicken is all one thickness, approximately 1-inch.  This allows the chicken to absorb more marinade and to cook evenly.)

Combine all of the marinade ingredients and whisk together.  Place chicken breasts into a one-gallon heavy duty freezer bag and pour in the marinade.  Expel any air in the bag and close tightly.  Turn and massage the bag to coat each piece of chicken with the marinade.  Place on a sheet pan and refrigerate for at least 6 hours, or overnight, turning occasionally.

One hour before grilling, remove the chicken from the refrigerator and allow to sit on the counter.  Preheat grill to medium heat.  Remove the chicken from the marinade and discard the marinade.  Allow excess marinade to drip off of chicken.

Clean the grill grate and lightly oil.  Place chicken on the grill and close the lid.  Cook for 10-12 minutes, or until chicken has nice grill marks and can be easily lifted from the grate.  Turn chicken over and cook for 10-12 more minutes, or until well marked.  Test chicken for doneness: press the center with your finger.  When chicken is done it will not yield to touch and will feel very firm.  A better way to check is with a instant ready thermometer.   Breasts are ready to be removed when they reach 160-degrees (during resting the tempt will rise to 165-degrees, which is the desired temperature for chicken).  If the chicken is not completely cooked through, reduce the grill heat to low, close the lid, and cook until it is.  Check about every 5 minutes.

Remove from grill to sheet pan, cover with foil and let rest for 10-15 minutes before serving.

Whipped Cream that won't fall flat!

There is nothing quite like the airy, creamy goodness that a dollop of whipped cream contributes to a dessert.  Unfortunately, it tends to fall and start to weep after a short time, especially during warm weather.  There is a solution!  This is the way pastry chefs keep their whipped cream stable, and you can very easily do the same!  Here is the super-simple recipe and method. (Click on the picture above see to the how-to video!)

Stabilizer:

2 Tablespoons unflavored powdered gelatin

1/2 cup water

Place gelatin in a small, microwaveable bowl.  Add water very slowly, stirring to dissolve as it is added.  Place bowl in microwave and heat on high for 40-60 seconds, until very hot and gelatin has dissolved completely (mixture will become clear).  Stir well and allow to cool.

To make 2 cups whipped cream:

1 cup heavy cream

2 Tablespoons confectioners sugar, passed through sieve (no lumps!)

1 Tablespoon stabilizer mixture, warm enough to be liquid, but not hot!

Beat heavy cream with whisk or whisk attachment on mixer until frothy then sprinkle in sugar while continuing to beat.  When the cream begins to thicken, increase speed to high, slowly drizzle in the stabilizer being careful not to pour it onto the beater or sides of the bowl. Beat until stiff.  Use immediately or store in tightly covered, odor-free container until time to serve. Leftovers (really?) will keep for up to 3 days in refrigerator, and can be frozen for later use, thaw in the refrigerator.

There will be enough stabilizer for 8 cups of heavy cream.  It can be frozen for future use.  If refrigerated, use within 7-10 days.  Warm mixture when ready to use.

Independence Day Cheesecake

No-Bake Independence Day Cheesecake

No-Bake Independence Day Cheesecake

I created this recipe when asked to be a featured chef on the 4th of July at the Chicago Botanic Garden's "Garden Chef Series" several years ago.  Since Feast of Eden was known for cheesecake, that was their request.  It takes hours to prepare a baked cheesecake, so this was my solution.  It is delicious and so appropriate for Independence Day with its red, white, and blue color.

Crust:

1 ½ cups vanilla wafer crumbs

2 T. sugar

3 T. butter, melted

Preheat oven to 375-degrees.  Spray a 9-inch cheesecake or spring form pan with non-stick spray. Combine crust ingredients and press firmly and evenly onto bottom of prepared pan.   Bake in preheated oven for 8 minutes, or until lightly browned and crisp.  Remove from oven, cool to room temperature, then place in the freezer and freeze.

Filling:

1 packet (¼ oz.) powdered, unflavored gelatin

¼ cup milk

1 pound cream cheese, softened

1 cup granulated sugar

1 T. fresh lemon juice

2 tsp. vanilla

1 cup whipping cream, whipped

1 cup fresh strawberries, crushed

1 cup fresh black berries, crushed

1 cup fresh raspberries, crushed

Additional berries for garnish

2 cups "Whipped Cream That Won't Fall Flat"

Sprinkle gelatin over milk in a microwave safe bowl and allow to soften for one minute.  Microwave in 10 second increments, stirring each time, until gelatin is completely dissolved.  Set aside to cool slightly.  In a mixer bowl combine cream cheese and sugar and beat at medium speed until light and thoroughly combined, about 3 minutes.  Slowly beat in gelatin.  Mix in lemon juice and vanilla.  Remove from mixer and fold in whipped cream by hand until no streaks remain.   Gently fold in berries.  Pour over frozen crust and smooth top.  Cover and chill until very cold and firm, about 6 hours. ( like this cheesecake frozen, too!)  Remove a hot knife around the edge to loosen pan.

Garnish with Whipped Cream That Won't Fall Flat and additional fresh berries just before serving.