Parmesan Crisps

Parmesan Crisp

Parmesan Crisp

Slightly salty, nutty, and crisp, these little disks of crispy cheesy complement a salad perfectly!  Quick and easy to make, they also are a fine addition to a cup of soup.  And they really dress-up whatever they are paired with!

For each crisp:

1 Tablespoon finely-grated Parmesan Cheese

Preheat the oven to 400-degrees.  Line a baking sheet with a silicone liner or parchment paper.

Place one Tablespoon of Parmesan on the lined baking sheet.  Gently smooth out into athin circle, making sure there are no holes.  Continue for each crisp desired.

Bake in preheated oven for 5 minutes.  Check, if not lightly browned, continue baking until they are a light brown.

Remove from the oven and let cool on the baking sheet.

Homemade Croutons

Homemade Croutons made from No-Knead Country Bread

Homemade Croutons made from No-Knead Country Bread

Croutons add crunch and some heartiness to a salad, but the purchased variety that come in a box are a sad substitute for freshly homemade croutons.  They are simple to make, and a great way to use up leftover bread, making them economical, as well.  My personal opinion is that croutons should be plain, with just a little olive oil and salt, allowing the flavors of the salad ingredients and dressing to shine!

3-4 cups of 1/2-3/4-inch diced stale bread, crusts removed (a sturdy bread works best)

3 Tablespoons olive oil

1/2 teaspoon kosher salt

Place the diced bread in a bowl and drizzle with 2 Tablespoons of the olive oil and sprinkle with the salt.  Toss with a spoon, spatula or your fingers until the oil and salt are well distributed throughout all of the bread.

Heat a 10-inch skillet (I prefer cast iron) over medium heat.  Add the remaining olive oil and heat until it shimmers.  Add the bread cubes.  Cook, stirring occasionally, toasting the bread until it is golden brown all over, 10 minutes or more. (Decrease the heat if the bread darkens too quickly).  Once the bread is browned, remove the skillet from the heat and allow the croutons to cool in the pan, stirring from time to time, which allows the croutons to dry out. 

The croutons can also be baked in a 400-degree oven on a sheet pan.  Add all of the oil to the bread in the bowl, then transfer to a sheet pan.  Bake, turning the croutons a few times, until they are golden brown all over. 

Cool before serving! Store in an airtight container or plastic freezer bag.

Roasted Garlic Heads

Lovely Heads of roasted garlic

Garlic!  While living in Gilroy, California my appreciation for this member of the onion family exploded, and I have always been a huge fan.  We lived right across the road from a field of garlic grown by Don Christopher, of Christopher Ranch.  In the early spring, as irrigation got under way, the air was filled with the aroma of fresh, green garlic.  That fragrance became much more pungent in late summer as it was harvested, and processed at a nearby plant.  (Some days it was smelled like I had cloves of the stuff up my nose, really!)  The changes in flavor that occur in garlic from exposure to heat are considerable.  Cooking over low to moderate heat mellows and sweetens the flavor, but high heat can cause it to become bitter and inedible.  I love roasting heads of garlic and using the resulting soft paste in all kinds of dishes.  Mixed with olive oil and Parmesan and spread on crostini for toasting in the oven, stirred into a vegetable saute, or added to a sauce, the applications are endless!  Best of all, a number of heads can be roasted at once, some of it refrigerated and the rest frozen, so it is on hand and ready for use whenever inspiration strikes!  Here is the easy method I use to roast garlic. 

4 heads of garlic

1/4 cup extra virgin olive oil

Salt

Preheat the oven to 400-degrees.

Use a serrated knife to cut the tops of the garlic off, exposing the tops of all of the cloves.  Place in a small glass baking dish, cut-side up.  Drizzle 1 tablespoon of the olive oil over each head of garlic, allowing it to soak down inside the head.  Wrap the entire dish with aluminum foil, taking care not to let the foil touch the garlic (tent the top of the foil a bit).

Place the garlic in the oven and roast for about an hour, or until all of the cloves are golden, very tender and beginning to protrude from the skin.

Remove from the oven.  Allow to cool. 

To store, squeeze the roasted garlic out of the skins into a container.  I refrigerate some for use within a few days, a freeze the rest to use later

Bentley's Favorite Dog Biscuits

Rolling & cutting dog biscuits!

Rolling & cutting dog biscuits!

These biscuits are all-natural and puppy-approved! Be sure to use all-natural peanut butter.  Check the ingredients on everything you use to bake for your dog; no spices, artificial sweeteners, or preservatives. (Xylitol is toxic to dogs and is added to some peanut butters).  And of course, introduce new foods gradually, so as not to upset Fido's digestive system.  This makes LOTS of treats, so freeze or give away any you can't use within a week to ensure freshness.

Equipment needed:  Stand mixer    Rolling pin   Parchment Paper  Half-sheet pans

Cookie cutter

1 1/2 cup canned pumpkin or mashed, cooked sweet potato

1 cup unsweetened applesauce (all-natural)

1 cup soy milk

1 1/2 cup all-natural peanut butter

2 Tablespoons molasses

3 Tablespoons flax seed meal

3 cups whole wheat flour

2 teaspoons baking powder

1 cup brown rice flour

2 + cups unbleached flour (enough to make a fairly stiff dough)

Preheat the oven to 325-degrees.

Combine the first 5 ingredients in the bowl of a stand mixer and mix on low to medium until thoroughly combined.  Combine the dry ingredients in another bowl and mix to combine.  With the mixer on low, add the dry ingredients a little at a time and combine.  If the dough is very wet, add just enough unbleached flour, a bit at a time, until the dough starts to leave the sides of the bowl.  It should be stiff, but not at all dry.

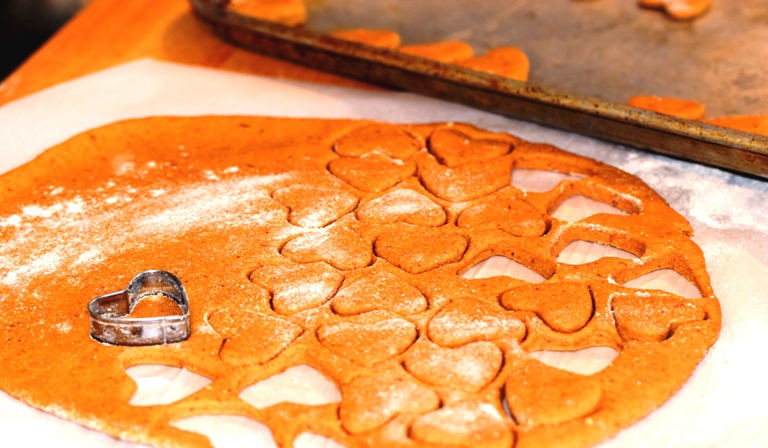
Lay out a sheet of parchment paper, then take about 1/4 of the dough and form it into a ball on the parchment.  Cover with another sheet of parchment, and using a rolling pin, roll the dough out thinly to about 1/8" thick. (Using parchment paper eliminates the need for more flour.) Even thickness is important, as the biscuits will not bake the same if they are different thicknesses. Cut out the biscuits and place them on an ungreased half sheet pan. (They can be very close, as they won't spread.)

Add more dough to the trimming of the first batch and re-roll.  Continue until all of the dough is used up.

Bake for 15 minutes, then turn the treats over.  Bake for another 15 minutes, then flip again.  Bake for 10 more minutes, or until the treats are crisp, like crackers.

Cool on the baking sheets.  Store in an airtight container, freezing any that won't be used within a week.