I love homemade bread! But it can be labor intensive, and if you've never made it before, a bit intimidating. Enter this recipe that I discovered from King Arthur Flour! This recipe makes bread baking easy, even for the beginner. The fact that it makes 3 or 4 loaves over the week makes it one of my favorites. You mix up the dough, place it in a large container, let it rise for 2 hours, then refrigerate the dough. You can use it in 2 hours, or any time for up to a week. This translates to freshly-baked, crusty bread several times during the week. It toasts well, and though it is a flatter-shaped bread, I have used it for paninis and grilled cheese. Left-over bread (if there is any!) makes fabulous croutons. Once you try this, you'll be hooked!
Equipment needed: 6-quart plastic bucket with lid Baking sheet Baking stone
24 ounces lukewarm water (That's about 105-degrees, but don't stress over the temperature. Just make sure it isn't really hot or just barely warm.)
2 pounds unbleached all-purpose flour (the correct ratio of water to flour is important for this recipe to work, so weigh it)
1 Tablespoon salt
1 1/2 Tablespoons instant yeast
In either the bowl of a stand mixer or a large (at least 6 quart) food-safe plastic container combine all of the ingredients and mix well to make a very sticky, rough dough. If using a stand mixer, transfer the dough to the plastic bucket now. (The dough is going to rise a lot!)
Cover the top of the bucket with a lid or plastic wrap and let it rise at room temperature for 2 hours. Then refrigerate it for at least 2 hours, and up to 7 days. (I like to make the dough a few days before I plan to use it; it gets a more "sour" flavor profile the longer it sits. If you're in a hurry, you can skip the initial 2 hour rise and just put in right into the refrigerator.) As you leave the dough in the refrigerator it will rise and fall over the first day or so; that's what it's supposed to do!
When you're ready to make the bread, sprinkle a little flour over the dough in the bucket to make it easier to grab. With greased hands grab a hunk of dough (1/4 to 1/3 of it) or 14-19 ounces. It will be about the size of a softball.
Just plop the dough onto a floured surface and shape into a round or log. It won't be perfect, so don't fuss too much with it. Place on a lightly greased or parchment-lined baking sheet, or on a piece of parchment if you have a baking stone.
Preheat the oven to 450-degrees, placing the baking stone in the oven to preheat if you are using one. Place a shallow metal or cast iron pan (not glass, Pyrex, or ceramic) on the lowest oven rack, and have 1 cup of hot water ready to go.
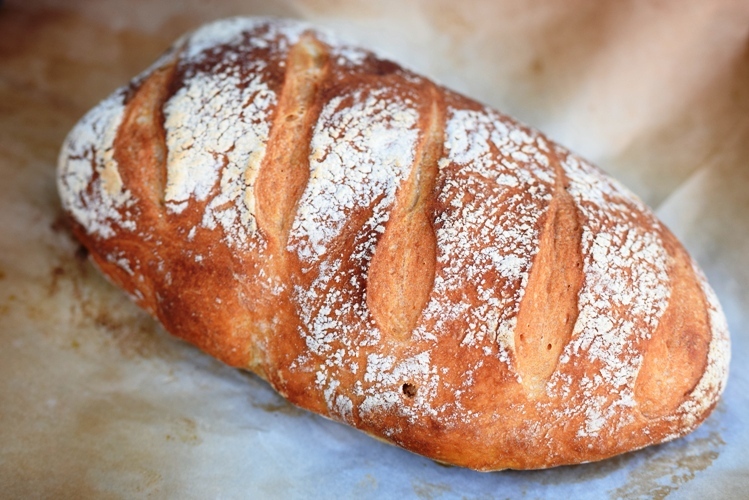
Let the dough rise for 50-60 minutes. It will spread more than rise tall, but you will notice that it expands quite a bit. Take a sharp knife and slash the bread 2 or 3 times, making the cut about 1/2" deep. The bread may deflate a bit, but it will pick right up in the hot oven.
Place the bread in the oven, and carefully pour the water into the shallow pan below. It will bubble and steam; close the door quickly!
Bake the bread for 25-35 minutes, until it's a deep, golden brown.
Remove and place it on a rack to cool. Store leftovers in a plastic bag at room temperature.